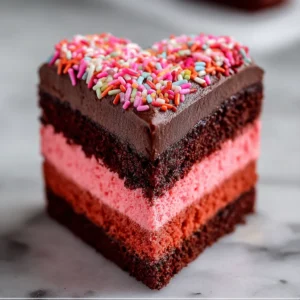
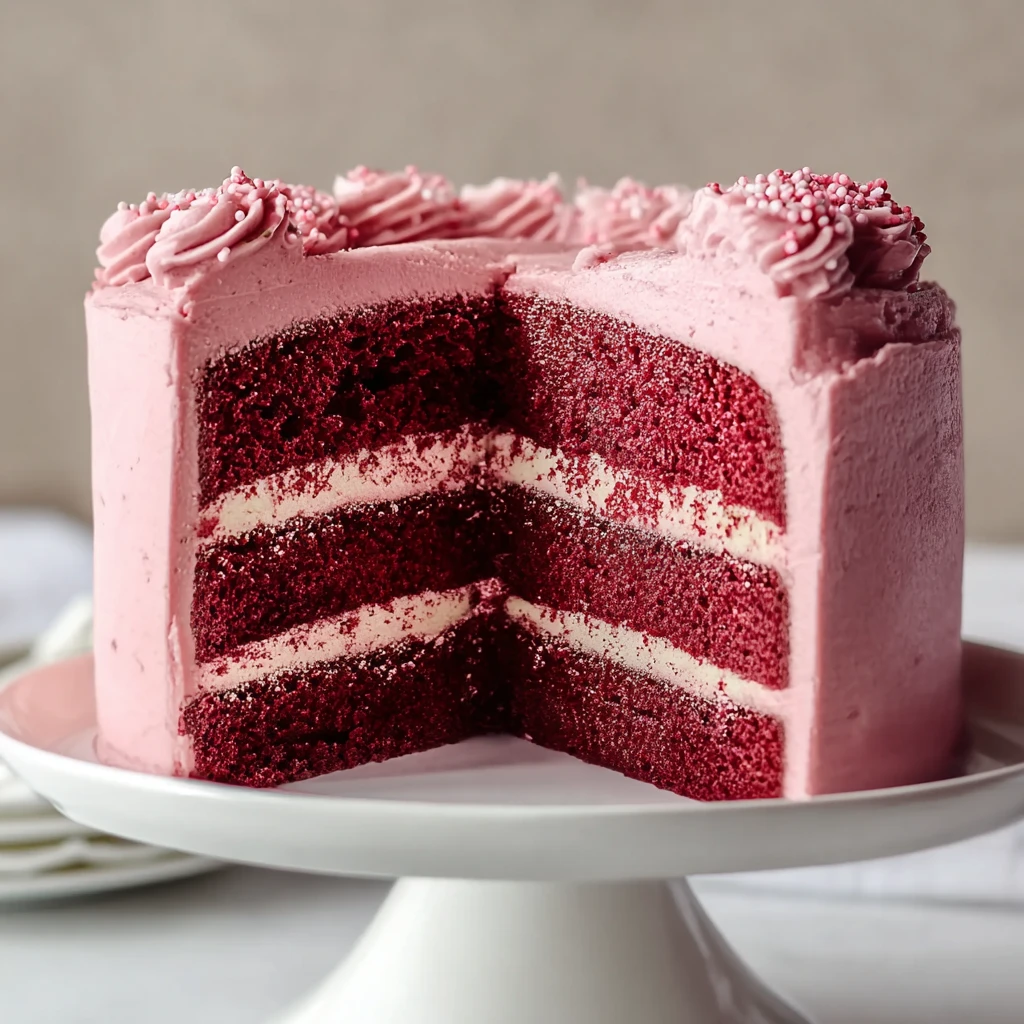
Pink Velvet Cake: 10 Simple Steps for Soft Celebration Layers
Introduction
Welcome to the world of decadent desserts where sweetness meets elegance – Pink Velvet Cake! If you’re looking to add a touch of whimsy to your celebrations, this delightful cake is the perfect choice. Imagine soft layers of pink velvet cake frosted with a luscious cream cheese icing – a treat for both the eyes and the taste buds. In this article, we will guide you through 10 simple steps to create these soft celebration layers that will leave everyone craving for more.
What makes Pink Velvet Cake so special is not just its vibrant color but also its velvety texture and subtle flavor. Whether it’s a birthday, anniversary, or any special occasion, this cake is sure to steal the show. With a hint of cocoa and a dreamy pink hue, it’s a dessert that evokes joy and celebration with every bite.
Throughout history, cakes have been a symbol of joy and festivity in various cultures. The Pink Velvet Cake, with its soft crumb and creamy frosting, continues this tradition of spreading happiness through indulgent treats. So, let’s dive into the world of baking and create something truly magical!
Get ready to embark on a baking adventure that will not only result in a visually stunning creation but also fill your kitchen with the irresistible aroma of freshly baked cake. So, roll up your sleeves, preheat the oven, and let’s start baking!
Why You’ll Love This Recipe
One of the best features of Pink Velvet Cake is its versatility. It can be adapted for various occasions, from baby showers to Valentine’s Day, thanks to its charming pink color. The moist and tender crumb of the cake paired with the tangy cream cheese frosting creates a harmonious blend of flavors that is simply irresistible.
For those conscious of dietary preferences, this recipe can easily be modified to suit different needs. By making simple ingredient swaps or adjustments, you can create a version of Pink Velvet Cake that aligns with your dietary requirements without compromising on taste or texture.
Whether you’re a baking enthusiast or a novice in the kitchen, this recipe is designed to be approachable and easy to follow. With clear instructions and helpful tips along the way, you’ll be able to recreate this masterpiece in your own kitchen with confidence.
Indulge in a slice of Pink Velvet Cake and experience a symphony of flavors that will transport you to a world of sweetness and delight. Share this cake with your loved ones and watch as their faces light up with joy – because every celebration deserves a touch of pink!
Ingredients
To create the magic of Pink Velvet Cake, you will need the following ingredients:
– All-purpose flour
– Cocoa powder
– Baking soda
– Salt
– Unsalted butter
– Granulated sugar
– Eggs
– Buttermilk
– Vanilla extract
– Pink food coloring
– White vinegar
– Baking powder
Feel free to explore optional ingredient substitutions based on your preferences. You can experiment with natural food coloring alternatives or different types of dairy or non-dairy products to customize the recipe to your liking.
Prepare your ingredients, measure them out accurately, and let’s begin the journey to creating a Pink Velvet Cake that will be the star of your next celebration!
Step-by-Step Instructions
1. Preheat your oven to 350°F (175°C) and prepare three 9-inch round cake pans by greasing and flouring them.
2. In a bowl, sift together the flour, cocoa powder, baking soda, and salt. Set aside.
3. In a separate bowl, cream together the butter and sugar until light and fluffy. Add the eggs one at a time, mixing well after each addition.
4. Combine the buttermilk, vanilla extract, and pink food coloring in a measuring cup. Mix the vinegar and baking powder in a small bowl.
5. Add the dry ingredients to the butter mixture alternately with the buttermilk mixture, beginning and ending with the dry ingredients. Stir in the vinegar and baking powder mixture.
6. Divide the batter evenly between the prepared cake pans and bake for 25-30 minutes or until a toothpick inserted into the center comes out clean.
7. Let the cakes cool in the pans for 10 minutes, then transfer to a wire rack to cool completely before frosting.
Follow these simple steps, and you’ll soon have three layers of pink velvet goodness ready to be assembled into a stunning cake that will impress your guests!
Expert Tips for Success
For the perfect Pink Velvet Cake, ensure all your ingredients are at room temperature before you begin. This will help the batter mix evenly and result in a lighter texture.
When adding the food coloring, start with a small amount and gradually increase until you achieve the desired shade of pink. Remember, you can always add more color but you can’t take it away!
To ensure even baking, rotate your cake pans halfway through the baking time. This will help the cakes rise uniformly and avoid any uneven browning.
If you don’t have buttermilk on hand, you can make a quick substitute by adding 1 tablespoon of white vinegar or lemon juice to 1 cup of milk. Let it sit for a few minutes before using in the recipe.
Variations and Substitutions
Looking to put your own twist on the classic Pink Velvet Cake? Try incorporating fresh berries into the batter for a fruity burst of flavor. You can also experiment with different frosting options such as a whipped cream topping or a berry-infused glaze.
For those with dietary restrictions, consider using gluten-free flour or dairy-free alternatives in this recipe. Almond milk or coconut milk can be excellent substitutes for buttermilk, providing a hint of nuttiness to the cake.
Feel free to unleash your creativity and make this recipe your own by adding your favorite ingredients or flavors. The beauty of baking lies in the endless possibilities for customization!
Serving Suggestions
When it comes to serving Pink Velvet Cake, a simple dusting of powdered sugar or a dollop of whipped cream can elevate the presentation. Pair each slice with a cup of freshly brewed coffee or a glass of sparkling rosé for a delightful dessert experience.
For a more elaborate presentation, garnish the cake with edible flowers, chocolate shavings, or fresh berries. These decorative elements not only add visual appeal but also enhance the overall taste and texture of the dessert.
Whether you’re hosting a formal gathering or a casual get-together, Pink Velvet Cake is sure to be a crowd-pleaser. So, slice it up, serve with style, and watch as your guests savor each forkful with delight!
FAQs
Q: Can I make this cake ahead of time?
A: Yes, you can bake the cake layers in advance and store them in an airtight container. Assemble and frost the cake just before serving for the best results.
Q: How can I store leftovers?
A: Leftover Pink Velvet Cake can be stored in the refrigerator for up to 3 days. Make sure to cover it well to prevent it from drying out.
Q: Can I freeze this cake?
A: Yes, you can freeze the unfrosted cake layers for up to 3 months. Thaw them in the refrigerator overnight before frosting and serving.
Q: Can I use natural food coloring instead of artificial color?
A: Absolutely! Natural food coloring options like beet juice or raspberry puree can be used to achieve a lovely pink hue in this cake.
Final Thoughts
As you reach the end of this culinary journey into the world of Pink Velvet Cake, we hope you’re inspired to whip up this delightful dessert in your own kitchen. From the soft layers of cake to the creamy frosting, every bite is a celebration of flavor and texture.
So, gather your ingredients, preheat your oven, and let your creativity flow as you bake this Pink Velvet Cake with love and joy. Whether you’re baking for a special occasion or simply indulging in a sweet treat, this recipe is sure to bring smiles and satisfaction to all who taste it.
Remember, baking is not just a culinary art but a form of expression and joy. So, embrace the process, enjoy the journey, and savor every moment as you create something beautiful and delicious. Happy baking!

Pink Velvet Cake: 10 Simple Steps for Soft Celebration Layers
Indulge in the whimsical world of Pink Velvet Cake, a delightful dessert with soft pink layers frosted with creamy goodness. This cake is a perfect choice for celebrations that deserve a touch of elegance and sweetness.
Ingredients
- 2 1/2 cups all-purpose flour
- 2 tablespoons cocoa powder
- 1 teaspoon baking soda
- 1/2 teaspoon salt
- 1 cup unsalted butter
- 2 cups granulated sugar
- 4 large eggs
- 1 cup buttermilk
- 2 teaspoons vanilla extract
- 1 tablespoon pink food coloring
- 1 tablespoon white vinegar
- 1 teaspoon baking powder
Directions
- Preheat the oven to 350°F (175°C) and grease and flour three 9-inch round cake pans.
- Sift together flour, cocoa powder, baking soda, and salt in a bowl. Set aside.
- Cream butter and sugar until light and fluffy in a separate bowl. Add eggs one at a time, mixing well after each addition.
- Combine buttermilk, vanilla extract, and pink food coloring in a measuring cup. Mix vinegar and baking powder in a small bowl.
- Add dry ingredients to the butter mixture alternately with the buttermilk mixture. Stir in the vinegar and baking powder mixture.
- Divide the batter evenly between the prepared cake pans and bake for 25-30 minutes.
- Let the cakes cool before frosting and assembling into a layered cake.